SAINT Classification Automation: Product Variable
Introduction#
Adobe Analytics Classifications (aka SAINT - SiteCatalyst Attribute Importing and Naming Tool) is a process to ‘classify’ data and apply additional metadata to values in a dimension. This allows us to breakdown reports by additional information /or groupings in order to better understand our reports and generate insights.
Classifications are mostly used on the campaign and product variables which helps use to categorize our analytics data then generate insights in different ways when we create reports. When classifying a variable we’re are actually establishing a relationship between the variable and additional data/metadata related to the variable.
For Example: If we track product SKU’s in s.prodcuts and want to see revenue by category, brand /or any additional metadata, we can use classifications to create groupings and add additional metadata in adobe analytics to display in reports. We can also use these values for report breakdowns.
Classification Tools#
Adobe Analytics provides two out-of-box tools for applying classification to variables:
Classifcation Rule Builder - This is automated rule-based classification builder, which can classify values tracked in specific intervals. It is easy to maintain an approach but requires a specific data format for values tracked.
Classifcation Importer - Adobe provides a template with a proper header which can be downloaded from UI, it will be used to add new metadata to the template and upload it to adobe analytics FTP account. It is a suitable approach when we cannot classify our data using a classification rule builder.
We will be using Classification Importer for our automation classification process using Google Cloud Platform for our s.products tracked.
Setting Up: Adobe Analytics#
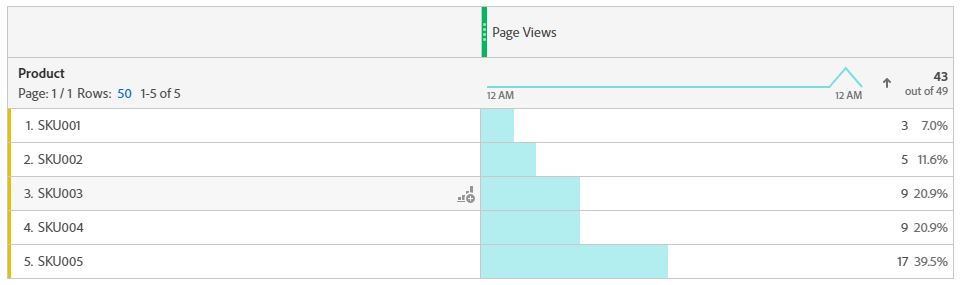
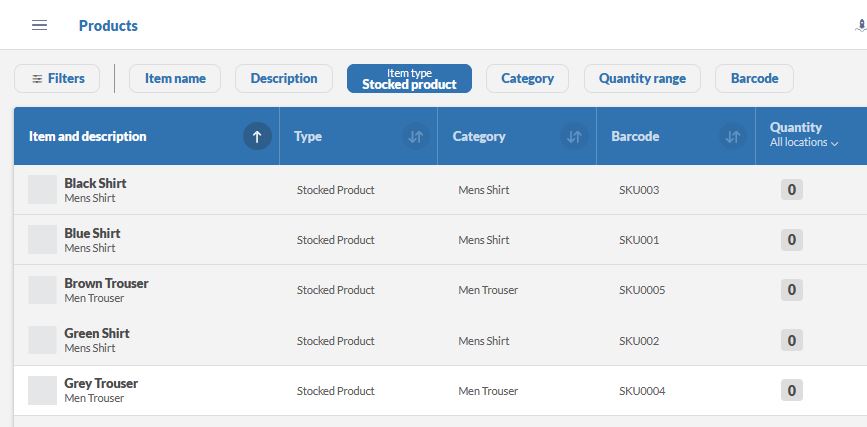
We will be classifying Product SKU’s tracked using s.products variable in adobe analytics, For example below we have 5 sample SKUs in our reports:
Let us set up additional metadata columns to get more out of our products tracking reports.
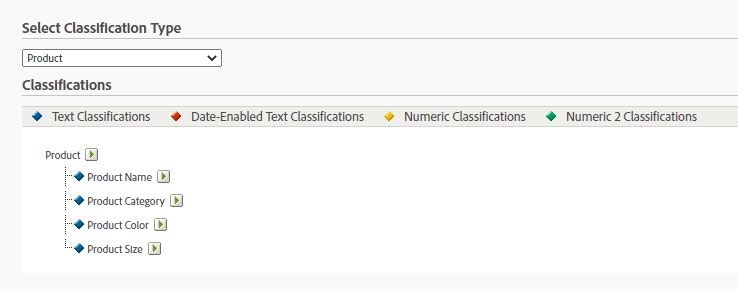
Once we’ve classification columns setup in adobe analytics UI, We can export template for data processing headers, we will use these header values to replicate the header for the template file in our google-cloud-platform cloud function setup.
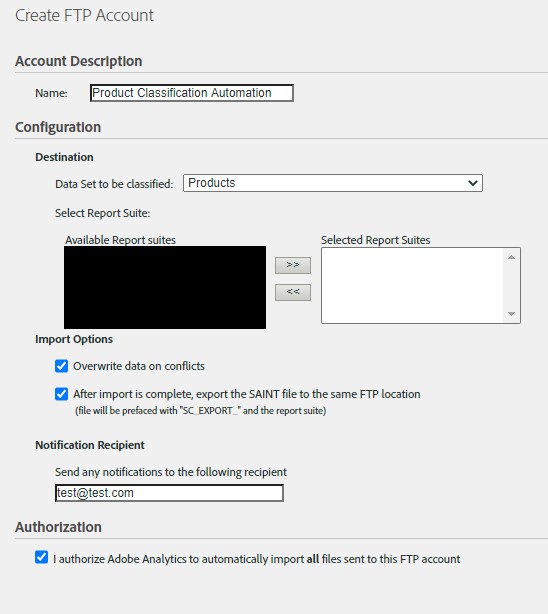
We can classify products variable in multiple report suites by adding report suites from ‘available report suites’ to ‘selected report suites’. This would create an FTP account for us where we will upload our updated classification template file with product metadata and FIN file, which will be processed by adobe analytics and will reflect updated classification columns in our reports.
Automate Classification Process#
We will be automating the complete process end-to-end for automating classification process by extracting data from our CRM/ERP/Product Inventory tools, updating classification templates and uploading in adobe analytics FTP for processing at a set frequency (weekly/monthly)
GCP Architecture
Google Cloud Platform Services
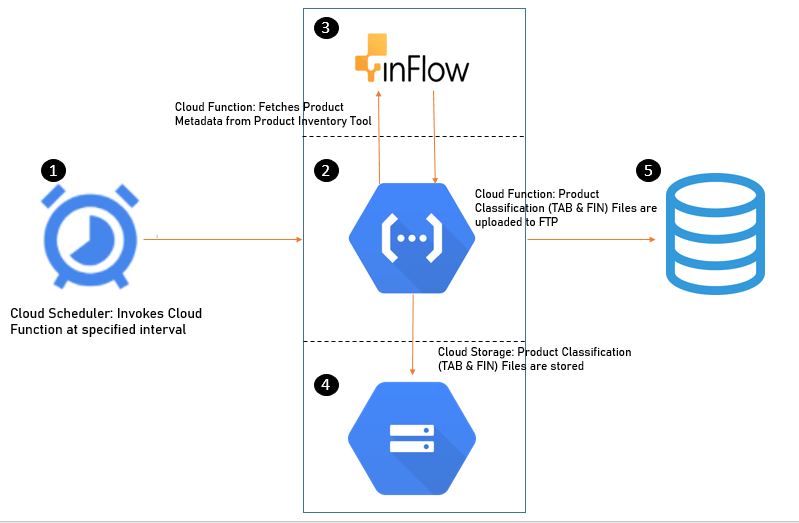
Cloud Function > We will set up one cloud function and will be using Python as the run-time language. This function will be fetching product metadata from our product inventory management tool (Inflow) using API, transform file as per classification template - create classification upload TAB file, FIN file and upload in classification importer FTP location.
Cloud Storage > Storage bucket - We will use one storage bucket to store our classification upload TAB file and classification upload FIN file. Please Note: FIN file is an empty file with the same name as our upload file but ‘.fin’ extension, this file is used to flag adobe analytics that the upload file is ready for processing.
Cloud Scheduler > Fully-managed cron job scheduler to automate our classification upload process
Process Overview#
Step 1> Product Management Inventory API > This is the data extraction step and will vary based upon the CRM/ERP or Product Inventory Management tool you are using, I have created a free trial account on Inflow [https://www.inflowinventory.com/], which provides API access for trial accounts as well. We will be using Inflow API to extract product metadata information from our tool and then add this to classification importer FTP for data processing.
Here we’ve a list of our product inventory that has additional metadata information useful for adobe analytics reports.
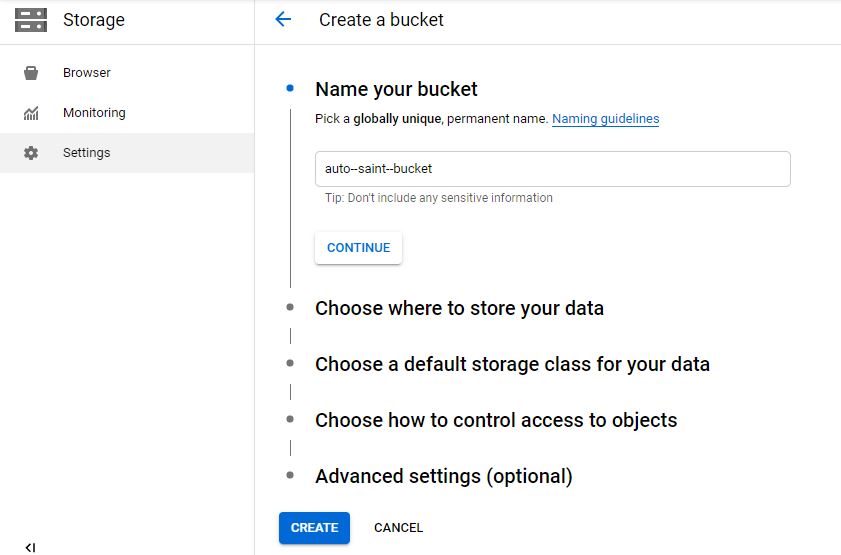
Step 2> Setup Storage Bucket > We will create a storgae bucket named “auto-saint-bucket”, We will keep all other settings to default and save bucket. This is where we will create and keep ‘productClassification.tab’ and ‘productClassification.fin’ files.
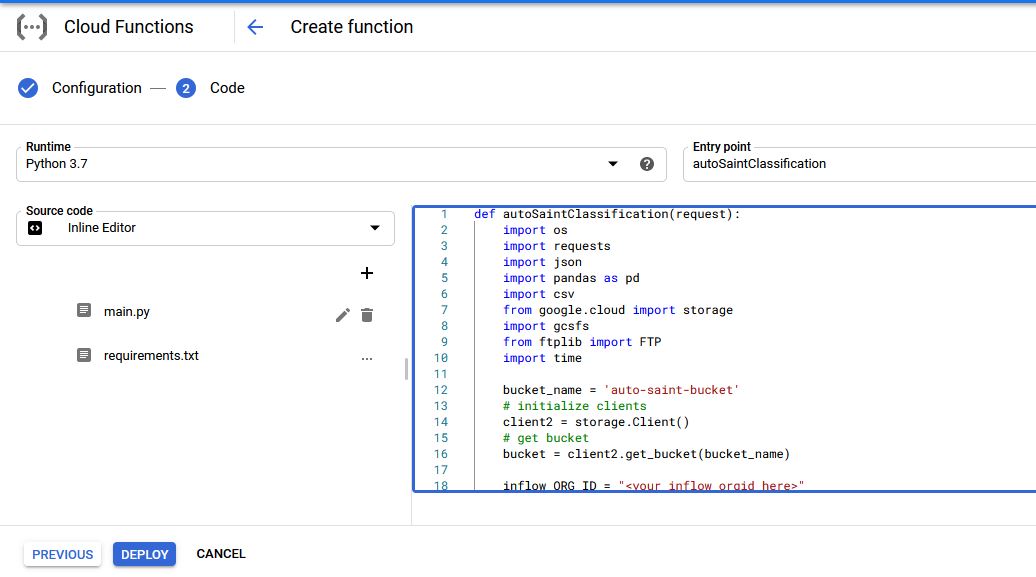
Step 3> Now let us set up our Cloud Function, We will need one cloud function, although we can split this process into multiple cloud functions for ease of management, I have used a single function for the complete job. Cloud Function - “autoSaintClassification” - This will get product metadata from inflow product inventory API, create classification importer template with required columns (TAB file), and FIN file - In last will upload created files into classification importer FTP (Adobe Analytics FTP) for processing.
Create Function [Name: ‘autoSaintClassification’] with HTTPS trigger, select python 3.7 from runtime drop-down and ‘autoSaintClassification’ as entry point.
def autoSaintClassification(request):
    import os
    import requests
    import json
    import pandas as pd
    import csv
    from google.cloud import storage
    import gcsfs
    from ftplib import FTP
    import time

    bucket_name = 'auto-saint-bucket'
    # initialize clients
    client2 = storage.Client()
    # get bucket
    bucket = client2.get_bucket(bucket_name)

    inflow_ORG_ID = "<your inflow orgid here>"
    inflow_API_KEY = "<your api key here>"

    FTP_address = "<ftp.omniture.com>"
    FTP_username = "<username>"
    FTP_password = "<password>"

    fs = gcsfs.GCSFileSystem(project='<projectName>')

    end_point = "https://cloudapi.inflowinventory.com/"+ inflow_ORG_ID +"/products"

    head = {
        "Authorization": "Bearer "+ inflow_API_KEY
        "Content-Type": "application/json",
        "Accept": "application/json;version=2020-08-06"
    }
    r = requests.get(end_point, headers = head)
    print(r.status_code)
    val = r.json()
    print(val)

    # create SAINT template
    try:
        file = fs.open(bucket_name +'/productClassification.csv','w')
        file.write("## SC\tSiteCatalyst SAINT Import File\tv:2.1\n")
        file.write("## SC\t'## SC' indicates a SiteCatalyst pre-process header. Please do not remove these lines.\n")
        file.write("## SC\tD:2020-10-30 05:51:44\tA:0000000:000\n")

    except:
        print('error in writing header')

    df2 = pd.DataFrame(columns=['Key','Product Name','Product Category','Product Color','Product Size'])

    for x in val:
        li = []
        li.append(x['barcode'])
        li.append(x['name'])
        li.append(x['customFields']['custom2'])
        li.append(x['customFields']['custom1'])
        li.append(x['customFields']['custom3'])
        try:
            df2.loc[len(df2)] = li
        except:
            print('error in writing file')
    file.write(df2.to_csv(index=None,sep="\t", columns=None))

    #rename file to .tab/.txt and create fin file
    blob = bucket.blob("productClassification.csv")
    new_blob = bucket.rename_blob(blob, "productClassification.tab")
    print("classification.tab file created")

    fin_file = fs.open(bucket_name +'/productClassification.fin','w')
    fin_file.close()
    print("classification.fin file created")
    ftp = FTP(FTP_address)
    ftp.login(FTP_username,FTP_password)

    def placeFileFTP(file_to_upload_FTP):
        filename = file_to_upload_FTP
        filename = filename.split('/')[1]
        open_one = fs.open(filefile_to_upload_FTP_to_upload, 'rb')
        ftp.storbinary('STOR ' + '/' + filename, open_one)
        print(f"file >> {filename} uploaded successfully")

    placeFileFTP(bucket_name +'/productClassification.tab')
    time.sleep(4)
    placeFileFTP(bucket_name +'/productClassification.fin')
    print('\nCompleted!!')
Step 4> Automate the process using CLoud Scheduler, We will invoke our cloud function ‘autoSaintClassification’ using HTTP endpoint. The frequency will determine the invocation time for our function we can set frequency as required. You can also use https://crontab.guru/ to setup cron job frequency.
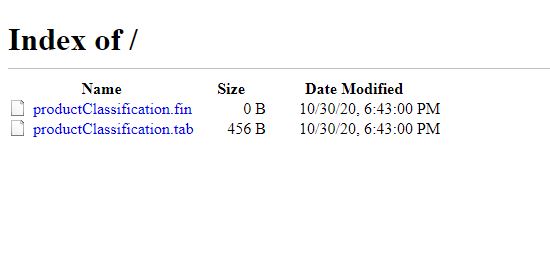
Step 5> Validate from FTP > Once we’ve tested our Cloud Function, invoked via HTTPS trigger directly /or using Cloud Scheduler Test Run, We should be able to see “productClassification.tab” and “productClassification.fin” files uploaded to Adobe FTP
Closing Notes#
The process above will automatically fetch, create and load the productClassification.tab and productClassification.fin files directly into the classification importer FTP account at our specified frequency in Cloud Scheduler. Automating this process will help us focus on driving insights from data and will save manual efforts.
If you enjoyed this post, I’d be very grateful if you’d help it spread by sharing it on Twitter/LinkedIn. Thank you!